US$5.99
Comentarios de Clientes
- Todos los comentarios (364)
- Imagen (41)
- Video (1)
Ordenar por:
Reseñas solo de tu país (Spain)
|
Mostrar original
Una parte de la reseña se ha traducido automáticamente.
-
03/04/2014
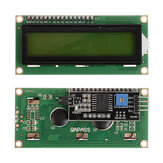
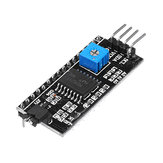
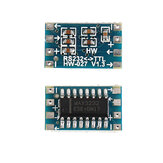
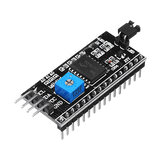
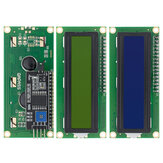
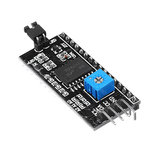
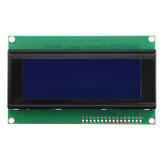
I used this with a Microchip PIC development board to interface to a 20x4 LCD display. With only 4 wires (including 2 for power) it's simple to set up and uses far fewer ports than the standard LCD parallel interface. As delivered the address pads A0 A1 and A2 are open but pulled high - so the I2C address is 0x4E. Ports P7,P6,P5,P4 of the PCF8574 interface to DB7,DB6,DB5,DB4 of the LCD Display. Port P3 is hard-wired to the backlight via a transistor: 1 = on / 0 = off. It's great that the backlight can be switched on and off via software with no additional hardware required. Port P2 is the display bit clock : E = 1 -> E = 0 active. Port P1 is R/W hardware Read/Write bit hardware : Read = 1 / Write = 0, so reading from the LCD display is possible, if required. Port P0 is RS Register Select : CmdReg = 0 / DataReg = 1. Display driver is HD44780 compliant. A great buy! I won't be interfacing to an LCD in future without it.
ComentariosMostrar original -
16/05/2015
I bought some of these and found out that there are different models which need different pin configurations. Here is a beginners guide for the ones from Bangood: http://safe-power.appspot.com/i2c-en.html You need to download one library, and you are ready to enjoy LCDs on your arduino with only 2 Arduino pins occupied (plus GND and VCC). This little board saves you time and pins :-)
ComentariosMostrar original -
 FabianVIP1CL18/01/2019
Good quality.
ComentariosMostrar original -
14/02/2021
Llegada con éxito a Marruecos y con buena calidad de envasado
ComentariosMostrar original -
09/04/2021
nice product. its really helpful to reduce the pins needed on a lcd. cool to see that there is a jumper include to enable or disable the onboard led. can be helpful in low power situations. the product was not damaged in shipping and the quality looks great!
ComentariosMostrar original -
11/09/2020
Recibido bien en buen orden y bien embalado. Aún necesitamos probarlos.
ComentariosMostrar original -
kabenerVIP3NL27/02/2017
The I2C interface module works fine on my blue 1602 LCD module. The I2C address is 0x27 out of the box so remember to modify your code accordingly. There is a very clear description that can be found here: http://arduino-info.wikispaces.com/LCD-Blue-I2C. It clearly describes the different available versions of the I2C interface. The one I received was version 3. When I first connected it and run the sample code I adjusted for the 16x2 display it did not seem to show any information on the display. The root cause was the potentiometer on the I2C interface not to be setup correctly out of the box. I needed to adjust it to change the contrast and show the characters on the screen. So I am happy with this interface as it reduces the connection to only 4 wires (2 for the power supply and 2 for the communication).
ComentariosMostrar original -
20/08/2013
After receiving item, I test it with good results. Runs fine.
ComentariosMostrar original -
08/07/2020
Fin trabajado en el primer intento. Preste atención a ajustar adecuadamente el contraste en el trimmer: los escritos en exhibición pueden parecer tan tenues que le hagan pensar que no funciona. Busqué la dirección con un escáner I2C (código fácilmente localizable en el sitio Arduino) y resultó para mi artículo 0x27. Para cambiar de dirección es necesario soldar puentes en los puntos A0-A1-A2 cerca del trimmer. Trabajó en el primer tiro. Tenga cuidado de ajustar el contraste con el trimmer, porque las letras en la pantalla pueden ser tan escamosas que no parece funcionar. Detectado la dirección con un escáner I2C (se puede encontrar fácilmente en el sitio web de Arduino) en mi muestra fue 0x27. Para cambiar de dirección es necesario soldar puentes en las canchas A0-A1-A2 cerca del trimmer.
ComentariosMostrar original -
19/10/2018
nice package
ComentariosMostrar original


Show:
Puedes estar interesado
-
 US$8.79
 -
US$6.99
-
US$11.54
5 Unidades de Módulo de Puerto Serial IIC/I2C/TWI/SPI 5V 1602 Pantalla LCD
-
US$11.49
Módulo de pantalla LCD Geekcreit® 5V 2004 20X4 204 2004A azul
-
US$16.99
-
US$11.49
-
US$5.99
-
US$8.61
-
US$17.99
-
US$6.99
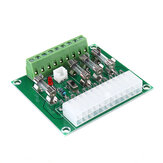
Módulo de adaptador de alimentación ATX para ordenador de escritorio
-
US$6.62
-
US$18.99
-
US$25.99
-
US$8.54
-
US$7.46
-
US$4.99
-
US$24.24
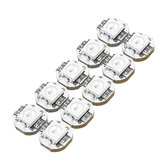
Placa LED SMD WS2812B Geekcreit® DC 5V 3MM x 10MM con IC incorporado - 100 unidades
-
US$22.04
-
US$57.49
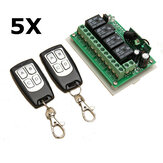
Interruptor remoto inalámbrico de 5Pcs Geekcreit® 12V de 4 canales y 433Mhz con 2 transmisores
-
US$17.19
-
US$16.99
-
US$23.09
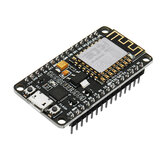
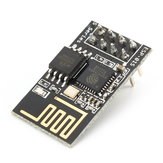
Módulo inalámbrico ESP8266 ESP-01S de puerto serie remoto con transceptor WiFi
-
US$17.99
-
US$5.74
-
US$16.16
Placa LED SMD WS2812B Geekcreit® DC 5V 3MM x 10MM con 50 piezas e IC incorporado-WS2812
-
US$39.84
1 par de adaptadores universales de aluminio NAB Hub de 10 pulgadas en negro para Studer ReVox
-
US$44.84


recommendation for you
-
US$5.51
-
US$26.55
-
US$8.99
-
US$5.99
-
US$8.04
-
US$5.99
-
US$6.99
-
US$6.99
-
US$15.00
-
US$8.04
-
US$17.24
-
US$11.49
-
US$13.79
-
US$4.59
-
US$20.78
-
US$4.59
-
US$3.99
-
US$44.84