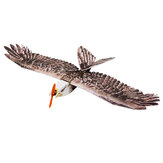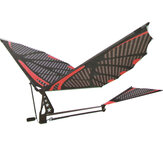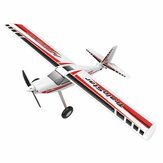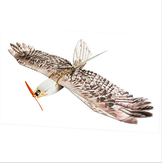
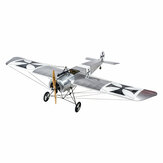
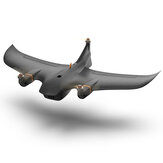
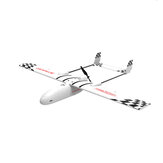
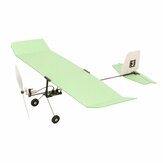
Dancing Wings Hobby DW Eagle EPP Mini Slow Flyer 1200mm Envergadura RC Aeroplano KIT
US$75.06
Una parte de la reseña se ha traducido automáticamente.
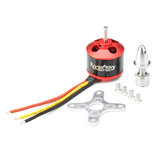
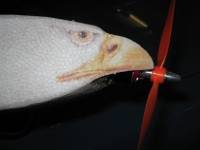
Model arrived in perfect condition. The instructions are OK at best, the pictures don't really help. I used the instructions as a guide and also made a few changes, that worked out better for the model. Firstly there was no foam glue included (not available for some countries) I used 5 minute epoxy, CA and hotglue. The wing halves when joined are very flat, I angled one of the joins a couple of degrees to give the wing some dihedral when both halves were glued (5min epoxy). I left off the 2 leading edge triangle parts (part B3) I assembled the fuselage structure and glued the 2 fuselage halves and part C3 on as per the instructions. *IMPORTANT* Before gluing parts C2 and C1 to the fuselage, get your motor, motor mount, firewall and prop fitted together and test fit where it will sit on the fuselage. The recommended place in the instructions was too far back for my motor, and the prop was in contact with the birds beak. I simply put the firewall mount in the position best to give the prop clearance and then worked back from there. I strengthened the firewall by adding triangle shaped ply to the back of the firewall and gluing it to the fuselage, all done with epoxy. Once you have the motor glued and are happy with its location, then go ahead and glue C1 & C2 into position, my C2 part needed trimming slightly to fit. Glue the V-tail as per the instructions, but measure and cut the triangle wood before gluing. my V-Tail is set at 115 degrees (Perfect!) Throw away the included plastic clevis', and Z bend the wire instead. I used the included control horns, and used the second hole closest to the control surface. My control rods cross, connecting to the servo. Running them straight caused to much strain and pressure, and the rods naturally want to cross anyway. My RX sits towards the tail, ESC and battery are forward of the servos. DO NOT use the instructions C of G location (70mm) My C of G is 30mm, and with a 1500mah 3S pack it balances perfectly. There is plenty of room in the battery area to allow for different sized packs to be used. Flight report - Awesome! Gentle toss and away it goes, only thing I need to change was the right thrust angle (I just need to remove some washers) and it's perfect. It flies smooth and slow. Only thing I would caution is other birds in the area. I managed to attract 6 Magpies, 4 crows & 4 pigeons at the same time! :) Remember - Test fit and strengthen the firewall, Z bends instead of the supplied plastic clevis', C of G at 30mm! Caution other birds :) My setup - Rockstar BR2212 1400KV motor, stock prop, 30A ESC, 1500Mah 3S battery, 2 metal gear servos, RX.

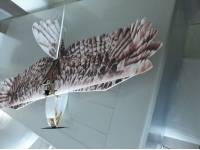
I had my doubts about this bird. I thought it might be too pitch sensitive since it is so short, but I was wrong. This thing flies really well and loves to circle just like the real ones do. It also look great in the air. What surprised me is it will thermal as well as some gliders that I have had. Considering the price this is a great way to have some fun and thrill a crowd that happens to look up and see it swoop by. Get yourself one. TIM
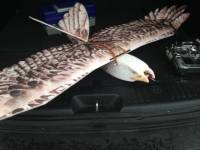

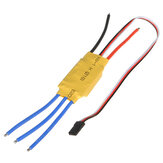
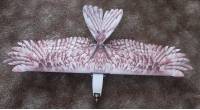
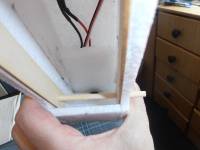
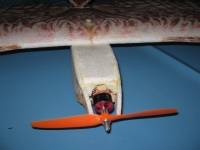
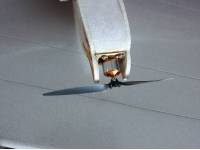
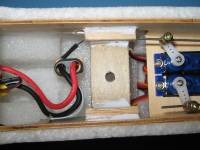
A nicely realistic looking bird model made from EPP. The parts are nicely coloured and precisely cut. I put this together in just one morning, no problems... It does have a couple of poor points, one being its weak nose, and the second being a heavy triangular piece of wood used for holding the fins to the correct angle at the rear.. Weight at the rear is never a good idea.. Despite the poor points I recommend this model... It looks the part.. I made some modifications at the nose, where it seemed weak and poorly thought out... I fitted two 8mm EPP horizontal braces , One was for my own tube type motor mount and the other is used as a battery tray. To start with I fitted an over sized axi motor..pic2, this will be changed later to get the correct COG.. ( being heavy at the rear it needs more weight at the front) The motor to esc wires go in and along the bottom of the fuzz to where the ESC is held on with velcro, pic3.. and the wires from the ESC come outthrough below the lipo tray/brace pic4..


Big fun to fly - easy going for beginners too ! Center of gravity is around 55 mm of leading edge !


I love this plane. It can almost fly at walking speed, and can turn with a radius of about 1 m. I added wing warping ailerons to mine but they did not work well. Ailerons are not needed anyway, but if you want you can cut them out easily. It flies very well using rudder v-tail. Set it up with 18 mm of elevator throw and 18 mm of rudder throw on each tail surface and it will fly with authority. I assembled my eagle using both thin and thick CA glue and kicker. The EPP foam can handle it. Hot glue works well too. Building it was easy. Make sure you align the feather markings on the wing and wingtip when you glue them together, and make sure you don't glue the motor mount with up thrust, and it'll be fine. I used a Racerstar BR2212 1000KV motor and 3S 1300 mAh battery with the propeller included in the kit. I painted the motor yellow to blend in with the beak area. It draws about 6,5 A at full throttle and climbs very well. I don't even have to throw it. I can give full throttle and just let go of it and it will fly away. All in all a lovely plane that looks like a bird in the air. Here's a video of the maiden flight: https://youtu.be/jRR0mTDc4-k


No lo he volado todavía (clima del Reino Unido) pero todo el mundo parece tener un buen tiempo. Es fundamental que la nariz esté reforzada. Una gran construcción está aquí... ¿Dave Merc ...... https://www.youtube.com/watch?v=I5VOT9D2gVw Síguelo con cuidado y todo debe ir bien. El mío ya está completo. Las varillas se cruzaron para dar un recorrido más recto. antenas a 90 grados en dos pequeñas pajitas de beber en la parte delantera de la cola para dar el mejor alcance. Si usted está volando sólo palo derecho, no utilice la mezcla de cola en V, que es normalmente para mezclar timón en el palo izquierdo y ascensor en el derecho. Utilice la mezcla de elevador, normalmente para aviones con alas delta, se mezcla elevador derecho y alerón derecho. Dejando sólo el acelerador en el palo izquierdo. Los controles deberían ser... Pégate a la derecha, desde atrás, ambas superficies se mueven a la derecha, es decir, la cola izquierda desde atrás es hacia arriba, la cola derecha es hacia abajo. Pégate a la izquierda , desde atrás, ambas superficies se mueven a la izquierda , es decir, la cola izquierda desde atrás es hacia abajo, la cola derecha es hacia arriba. Pégate a ti para arriba, ambas colas hacia arriba. Mantente lejos de ti para abajo, ambas colas hacia abajo. Es posible que tenga que invertir el canal 1 o el canal 2 dependiendo de la dirección del servo en su radio para dar las direcciones deseadas. Espero que esto ayude Ian.


I bought this eagle to try and I am very happy with his performances. I equipped it with a brushless 2212 powered by 3S. I installed a CCD camera and a VTX 25mW, it's great. I can fly even in high winds without any problem. Do not hesitate if this bird interests you.


Not a difficult build at all. There are a couple of things that are not completely clear with the supplied instructions, but if you have a little building experience you'll have no issues building this one. The CG on the book is stated as being 70 mm from the leading edge and that make the bird extremely tail heavy and caused mine to stall almost immediately and nose diving into the ground. Easy fix, but make sure to have the CG at around 30-35mm for any chance at flying this bird. If it gets destroyed, I would probably not get another, but in the meantime I will absolutly enjoy flying it. I might even see if she'll slope soar....

Ladder operation enables a very stable flight, keeping the house at home, and taking it easy to handle in order to fly, the aircraft can be disassembled and stored in a carry box.


Works very well, give engine a lot of down thrust, see my picture! The rubber bands wont hold a day in the sun, replace with plastic screw.


ESKY Albatros 2600mm Envergadura Planeador EPO Avión RC con Vtail actualizado PNP


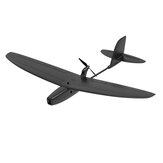
ZOHD Drift Dark Breeze Planeador FPV de Ala Fija de EPP de 877 mm de Envergadura RC PNP


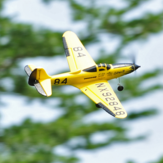
Avión RC de espuma KT con motor Dual Motor De Havilland DH.88 y una envergadura de 460 mm, KIT+motor

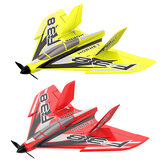
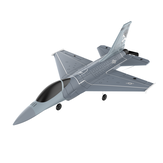
QTMODEL F38 Hornet 800mm Wingspan EPO Delta Wing Glider Racer Racing RC Airplane KIT/PNP
Avión de RC de espuma KT Pinkus Racer Aerobatic con envergadura de 320 mm y kit de motor


Reptil S800 SOMBRA CIELO Envergadura 820mm Ala FPV Ala Voladora EPP Competencia de Ala RC Avión KIT
REPTIL DRAGÓN-2 1200 mm Envergadura Doble Motor Doble Cola EPP FPV Avión RC KIT/PNP
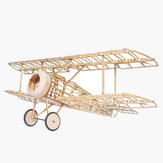
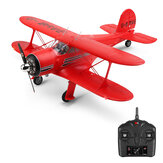
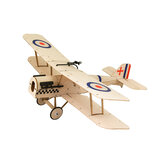
Mini avión de combate Camel de 380 mm de envergadura de madera de balsa para kit de avión RC
HEE ALA T-1 Ranger Envergadura de 730mm Doble Motor EPP FPV Racer Avión RC Ala Fija KIT/PNP
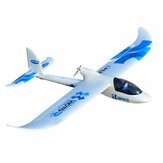
Sky Surfer X8 Envergadura de 1480 mm Avión FPV de EPO Control Remoto PNP

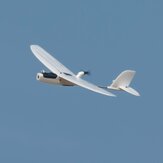
Planeador FPV ZOHD Drift de 877 mm de envergadura con ala única EPP, avión RC PNP versión FPV

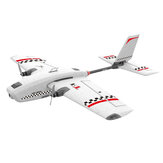
Avión de transporte C-160 Cargotrans Twin Hercules de 1120 mm de envergadura EPOS Warbird RC PNP

Sonicmodell Baby AR Wing Pro Envergadura de 682 mm Ala de EPP Avión RC de Ala Volante FPV KIT/PNP
VolantexRC Ranger 1600 V757-7 1600mm Envergadura EPO FPV Aeronave RC Avión PNP